The Machaca Fruit Fly – a Must Have Pattern for Fly Fishing Costa Rica!
One of the most exciting fly fishing opportunities in Costa Rica is targeting the machaca! These stocky fish are found in lowland waters throughout Costa Rica, and can be fished from either a drift boat or on foot. Machaca fly fishing is always an adrenaline rush – these fruit and seed eaters readily and explosively take flies on the surface! But how do you prepare for a fly fishing trip where the fish doesn’t eat “flies” – only fruits, seeds, and nuts? This article will walk you through how to make a killer fruit fly for machaca in Costa Rica, and you’ll be well prepared for your adventure!
What is The machaca fish?
The machaca is part of the Brycon family, which contains 46 separate species. There are two species of machaca found in Costa Rica – Brycon behreae, which is smaller, silver in color, and found in the Pacific drainages, and Brycon costaricensis, which is larger, golden, and resides Caribbean rivers. Both species of machaca love fast flowing currents, and can hold in rapids that seem almost uninhabitable. Machaca are characterized by their deep and muscular bodies, broad tail, and a mouth full of sharp teeth! When they’re juveniles, machaca use these sharp teeth to hunt insects, small fish, and other prey. But as they get larger, they start to look upwards, waiting for the trees of the rainforest to deliver their meals on a platter.

The rainforest has a dizzying array of fruit bearing trees, but two are of the most importance in machaca fly fishing. The Chilamate (Ficus insipida) is found on the Caribbean side of the country, growing on the river’s edge. It bears large, green fruit that can be seen from quite a distance, and the machaca always seem to know which trees have ripe fruit that are ready to fall. On the Pacific side, the tree of most importance is the Espavel, or wild cashew (Anacardium excelsum). These trees start dropping fruit in March and April, and those months can have wild feeding frenzies, with schools of machaca competing to eat the first thing that falls in the water!
How to tie the Machaca Fruit Fly pattern
So we’ve got a fish that loves to eat fruit. How does the fly fisherman approach this situation? We need to make a fly that checks a few boxes.
- It has to float, so the fly fisher can detect the strike
- It has to be heavy enough to make a very loud splash (or “plook”) when it hits the water, so that nearby machaca can hone in on the sound
- It has to be durable enough to stand up to the machaca’s razor sharp teeth!
Through trial and error, and lots of practice, Fly Fishing Costa Rica has come up with a super simple and highly effective machaca fly pattern, that we’re happy to share!
Collect your materials
The first and most important step is to crack open a bottle of red wine. We recommend a dry, full bodied varietal – ideally malbec, but cabernet sauvignon can do in a pinch. Pour yourself a glass (or two), and keep the cork on hand – this will form the body of your fly pattern.
Additionally, you’re going to want a strong, wide gapped hook – the Gamakatsu SC15 in size 2/0 or 3/0 is excellent. For tools, you’ll want to have a saw or utility knife for cutting the cork, and superglue to attach it to the hook. Sandpaper and a razor blade/xacto knife can also come in handy. In terms of thread, monofilament or 6/0 Veevus will provide a strong base for the glue to grip. Lead/lead-free wire (.035”) will be used on the hook shank. And finally you’ll want some green paint to color your fly pattern- acrylics, oils, and even nail polish all work well!
Preparing the cork
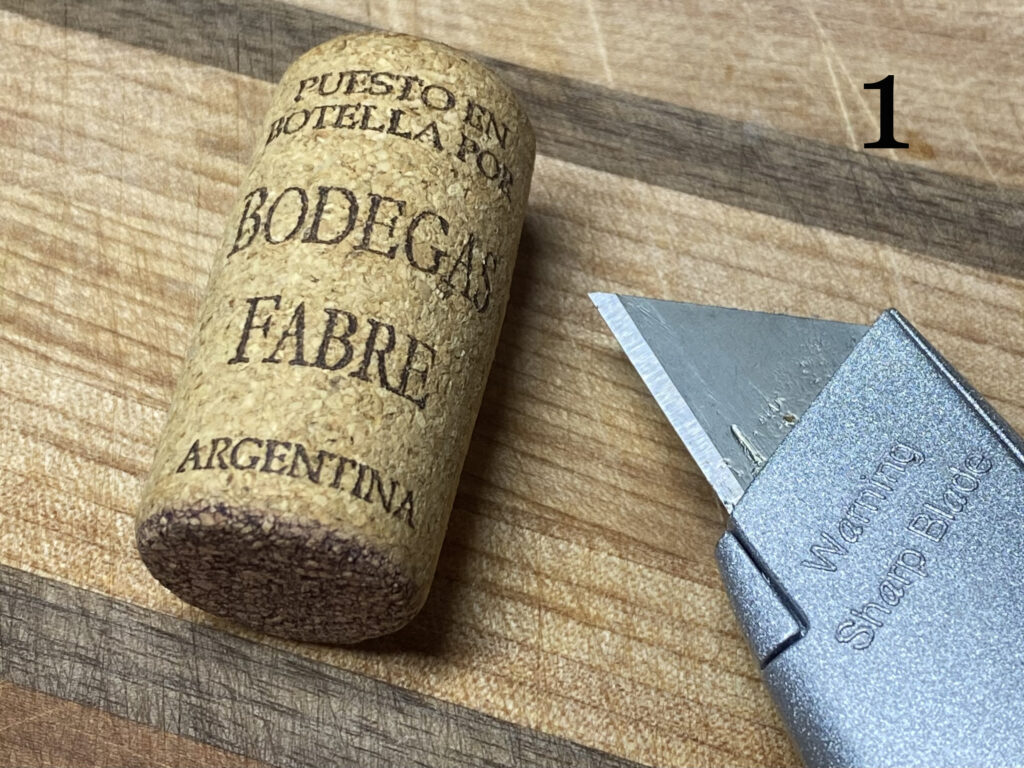
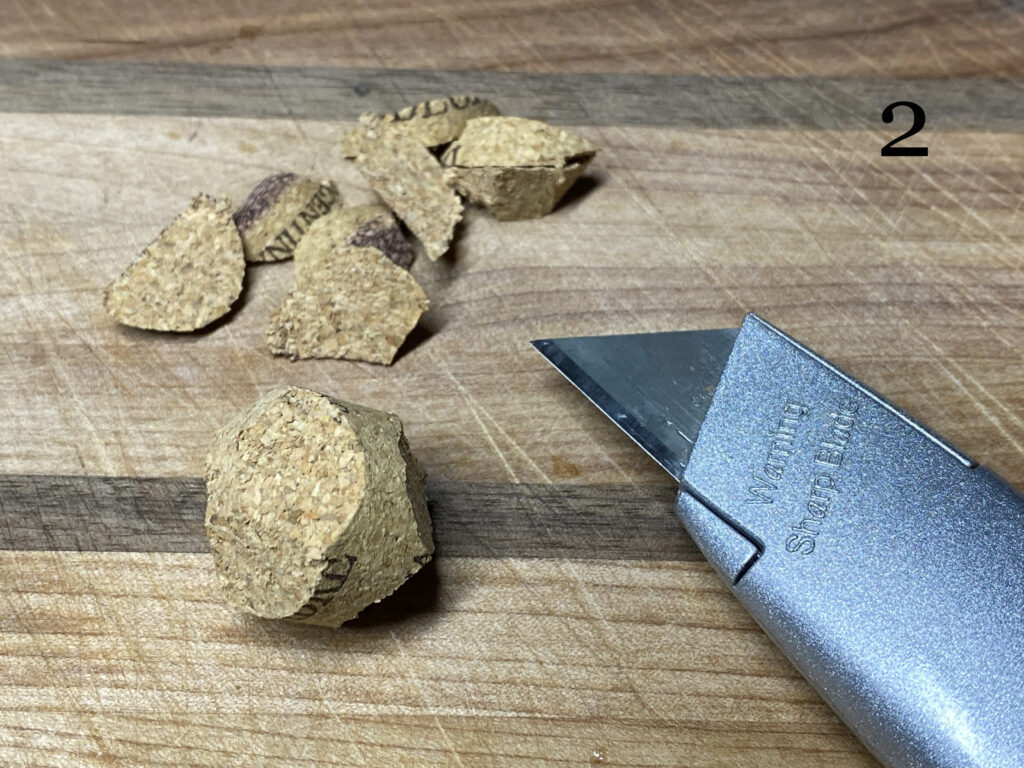
Carefully using a saw or utility knife, cut the cork down the middle, separating it into two equal pieces roughly three quarters of an inch long. From this point, make cuts around the edge of the cork piece. You’re aiming to make the rough shape of a sphere, with one end a little flatter- this is where you’ll mount the hook.
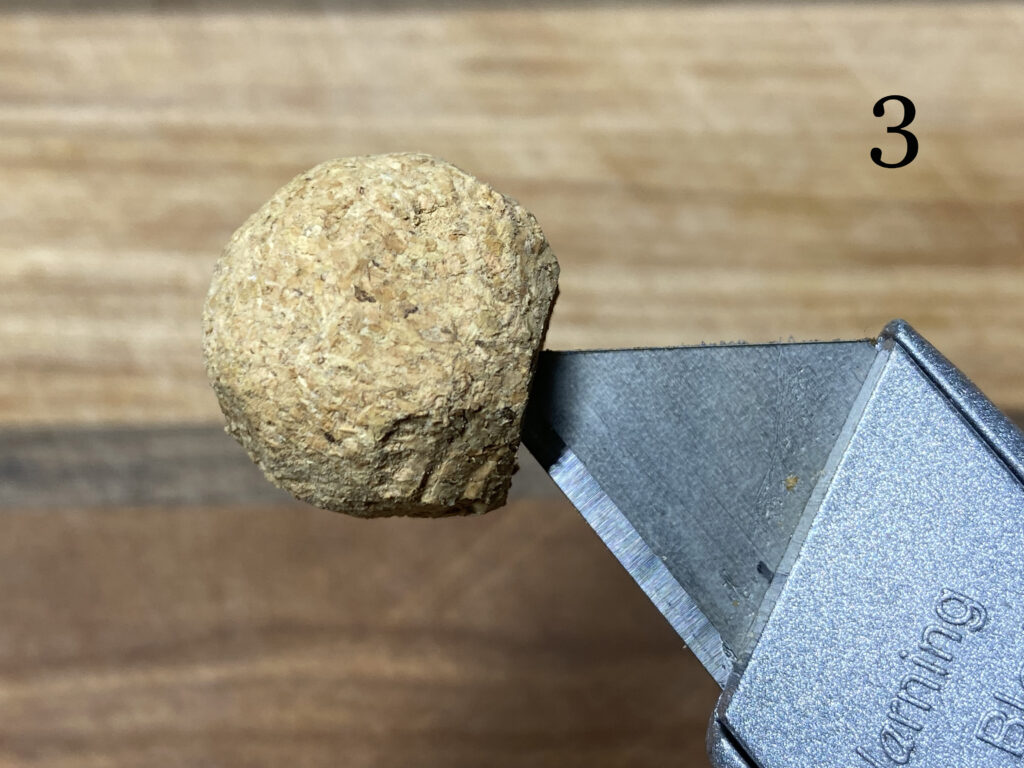
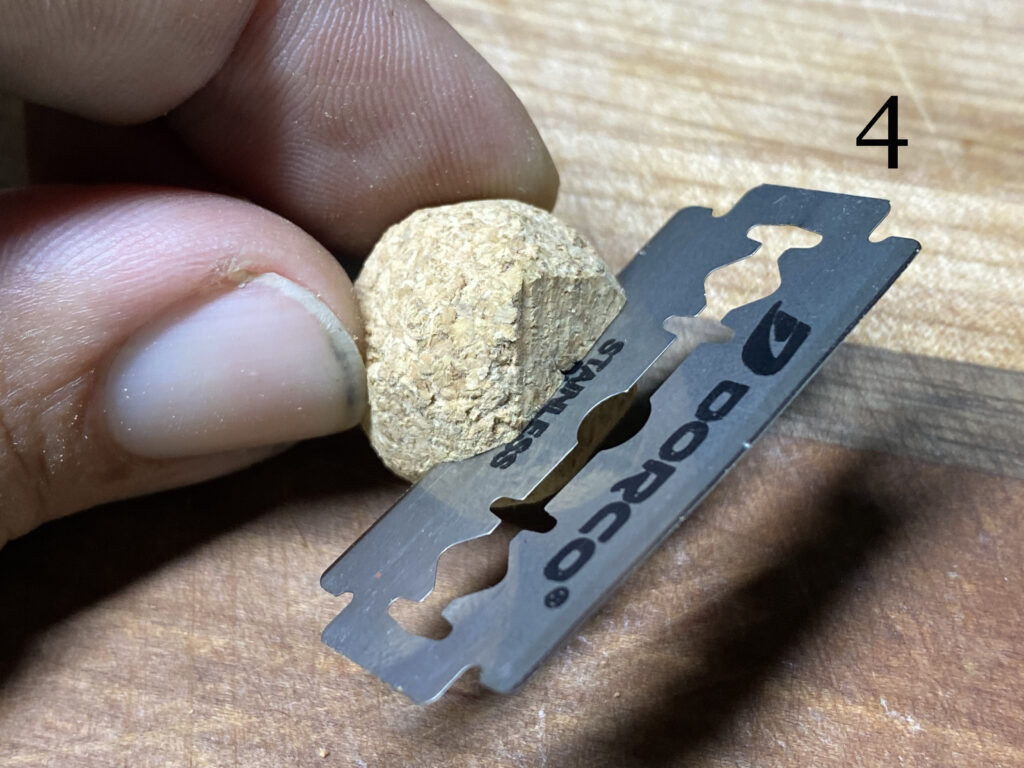
The cork can be mounted as-is- machaca sometimes aren’t that picky- but you can also sand the cork down, using increasing grits of sandpaper to end up with a smoother finish. Once you’re happy with your cork, cut a slit down the center of the cork, to a depth of about one quarter inch.
Preparing the hook
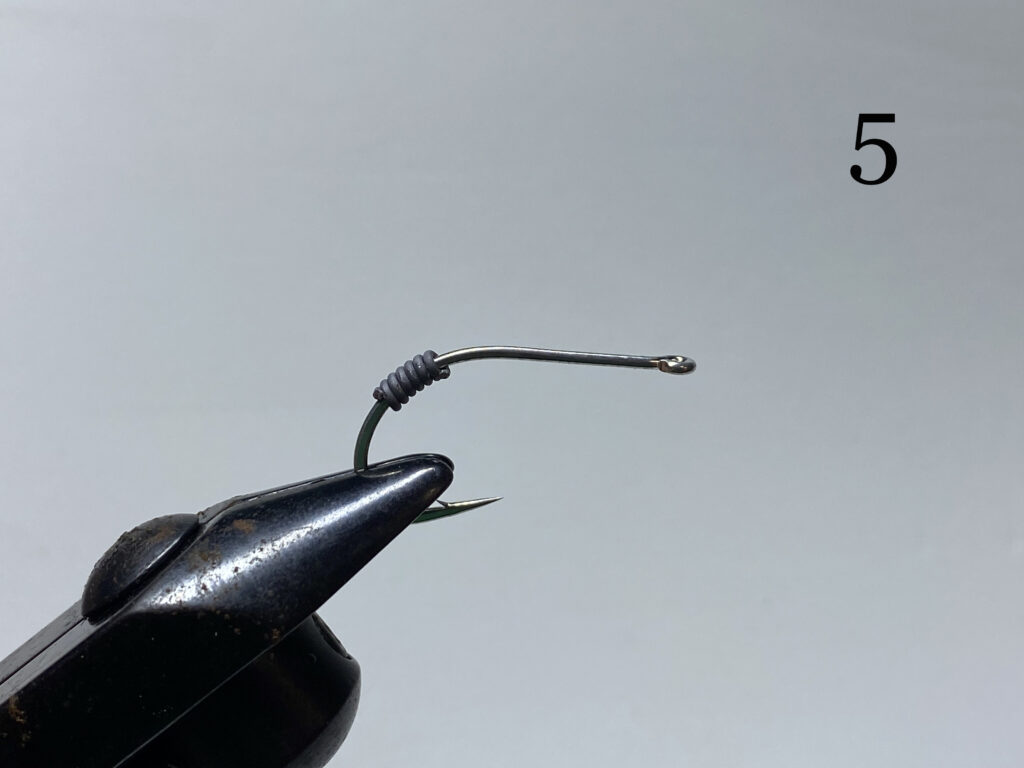
Mount the hook in your vise, and pull out your lead wire. The lead serves three purposes- to keep the cork from rotating around the shank, to make sure the fly is always landing with the hook pointing up, and to provide some extra weight to make a loud splash. Palmer about 5-6 wraps of lead wire on the shank of the hook, then apply a bead of superglue, just below the bend. Slide your lead wire onto this bead of glue so it sits securely (this can be coated with UV resin for extra durability).
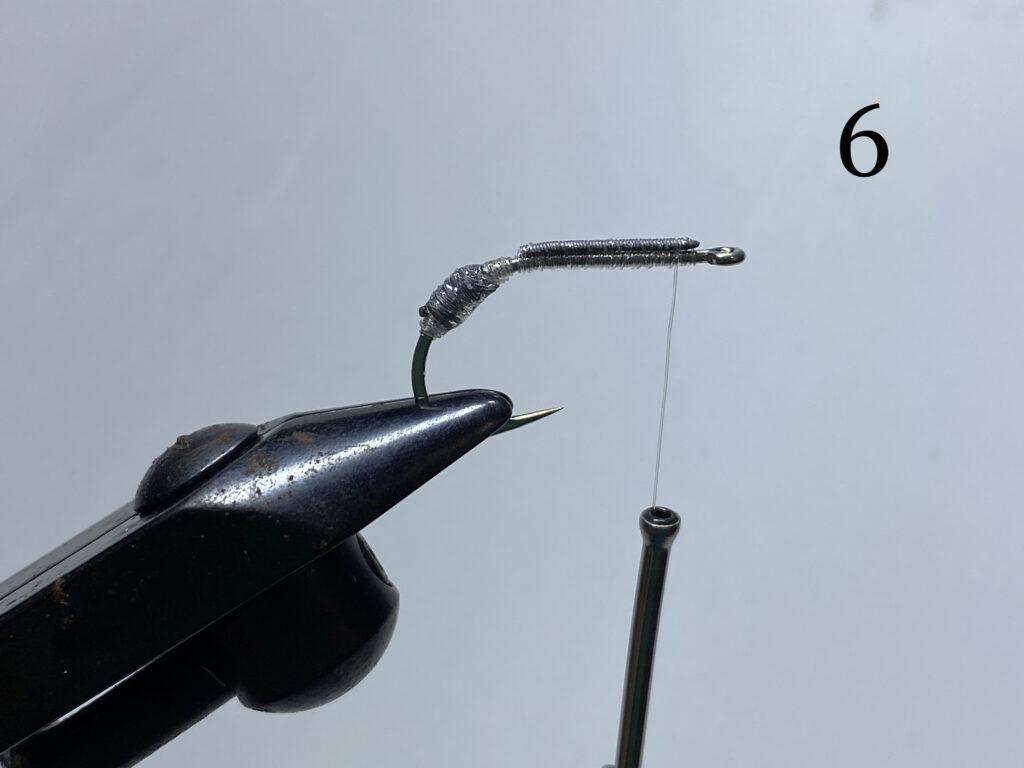
Now tie on your thread of choice, just behind the eye of the hook. Put down a solid base of thread. To keep the cork from rotating, tie a strip of lead wire down the top of the shank, just to the bend of the hook. Make sure to use plenty of thread wraps, as this will give your superglue something to grab onto! Whip finish the fly, and finish off that glass of wine!
Mounting the cork
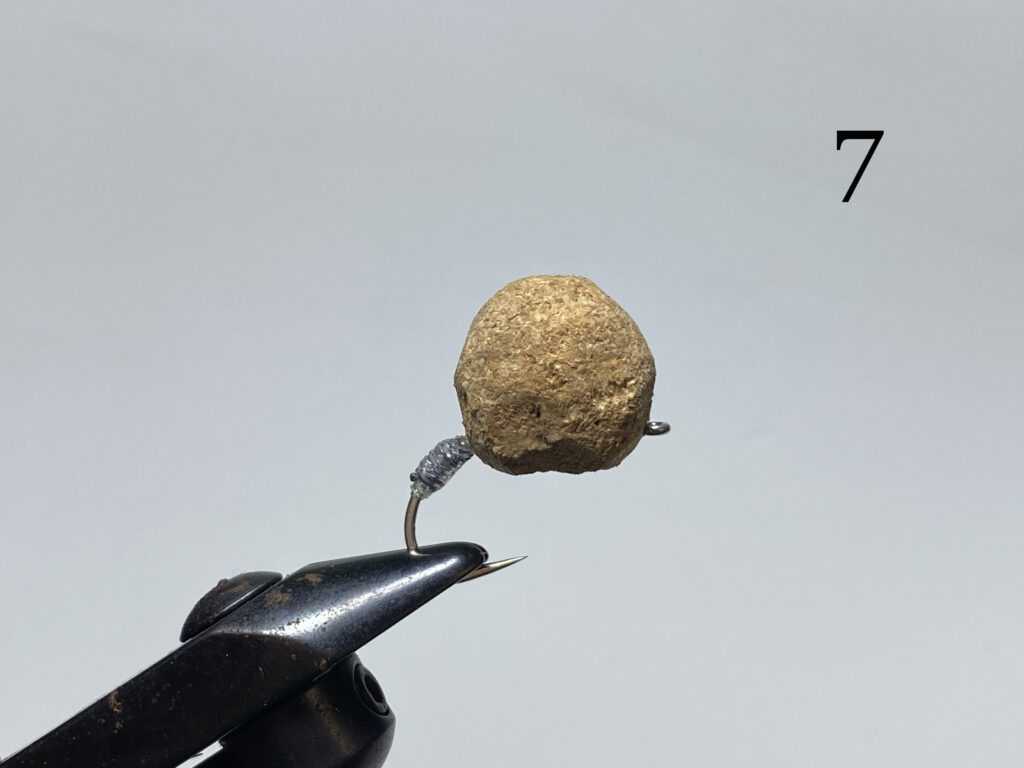
Dry fit the cork onto your hook. Take a look at it- is the cut you made deep enough? You may need to widen the cut just a little so that it fits over the lead wire and hook shank without too much flare. Once you’re happy with the fit, apply a generous amount of superglue to the hook shank and press down the cork. Be sure that it’s going on flush, and not tilted to either side. Hold this firmly in place for thirty seconds or until the glue has cured, then let it cure fully for at least a couple hours. The fly can also be clamped at this stage to ensure a super strong bond.
Finishing touches
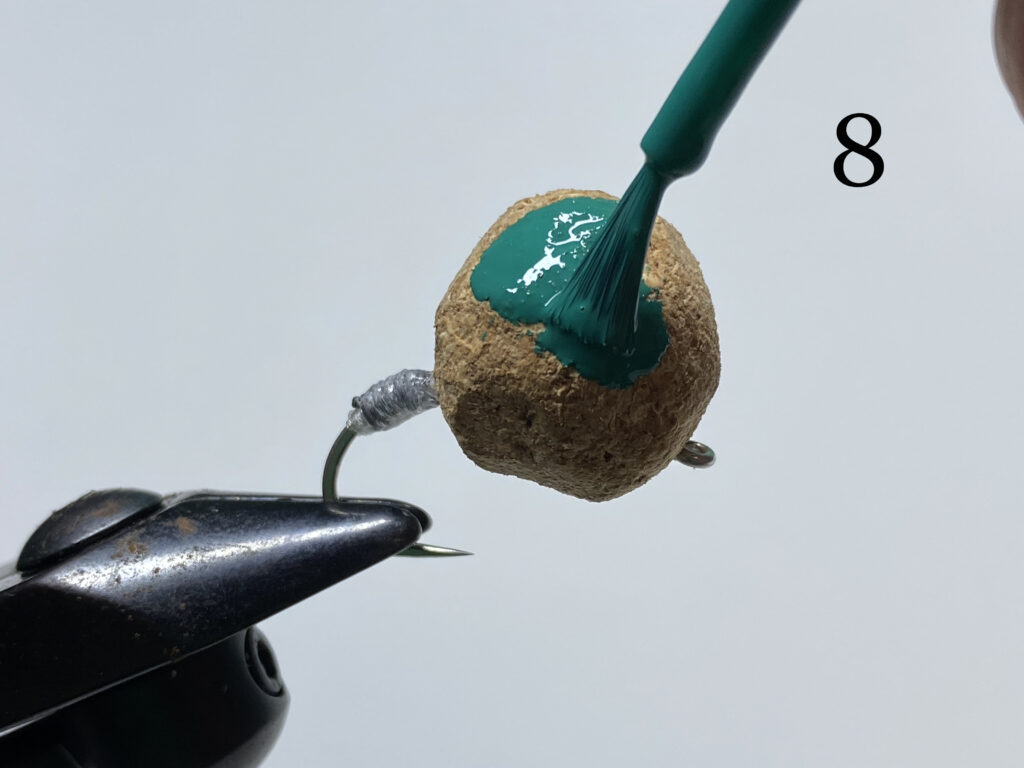
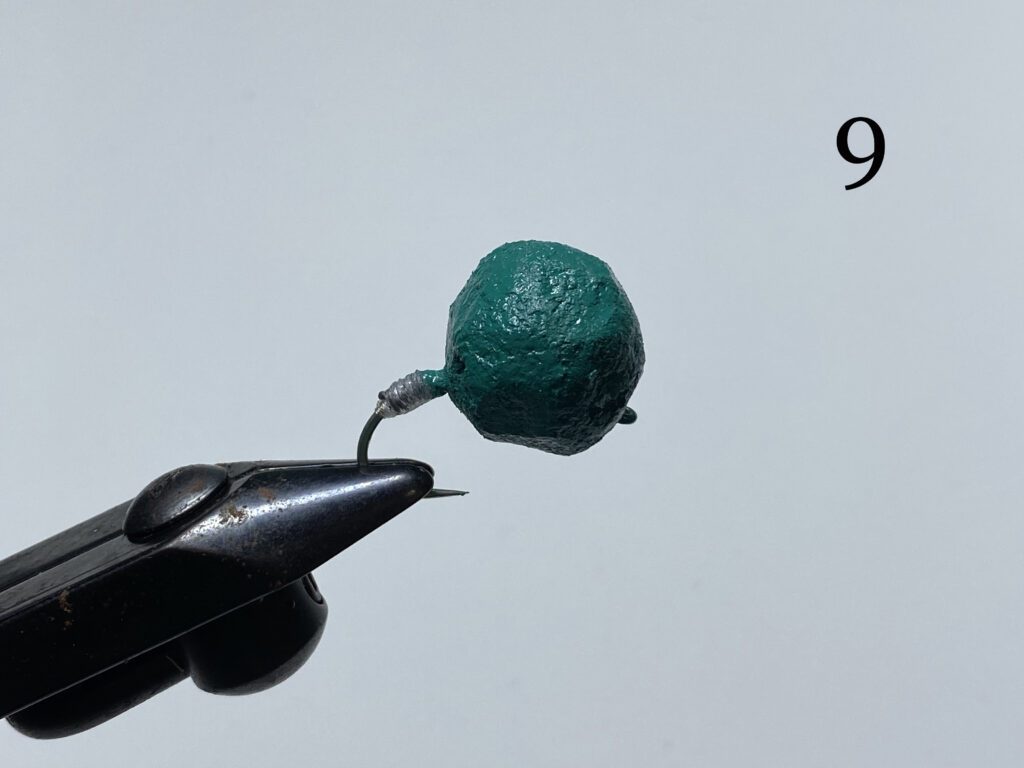
At this point, all that remains to finish off your machaca fruit fly pattern is a fresh coat of paint! Dark green is always a good choice, but feel free to look up real life references of the chilamate or espavel fruit and paint your fly pattern appropriately. Always remember to use two thin coats of paint, letting the first coat dry completely before applying the second- you’ll get a much smoother result. For extra durability, you can add a coat of gloss varnish on top – but it’s not always necessary, especially if using nail polish.
Once your paint is fully dried, toss your machaca fruit fly in your fly box, and repeat! It’s great to have a handful of different colors and sizes, your guide will be able to tell you what will work best on a given day.
Now finish off that bottle of wine- you’ve earned it!
Want to try your hand at blasting down rapids, targeting hungry machaca on the surface? Click here to find out more!
Machaca fishing is great fun for families and kids, as well. No experience required! Learn more on our Family Eco Adventure page!
Interested in more than the machaca? Combine it with other species- our Freshwater Diversity in the Jungle page has all the details!
And be sure to follow us on Instagram!